Installing Dell 5110cn Drivers
on Windows XP/Vista.
This
tutorial will show how to install the dell drivers and printer on a Windows XP/Vista machine
in order to print using the Dell network printer located on the 6th
floor.
REMEMBER IF YOU ARE ON WIRELESS!!!!!
connect using vpn otherwise you won't be able to connect to the printer to print.
This tutorial includes drivers for Windows XP and Windows Vista 32 bit editions.
If you need a 64bit driver and update driver (if you have XP/Vista 64bit) please visit
this link select in operating system your 64 bit OS and download the drivers and then follow along.
INSTALLING THE DRIVERS
To get the drivers for Windows XP/Vista (32bit version) click here.
Double click the R168756 (driver) to start installation of drivers
Click continue-ok-and yes if it prompts you to create the file.
After that has completed it will tell you all files were sucessfully unzipped
They unzip to C:/dell/drivers/R168756
Setting up the printer.
This tutorial was done with a Vista 32 bit machine
but it is done the same for all windows systems XP and higher.
First go to Start-Control Panel
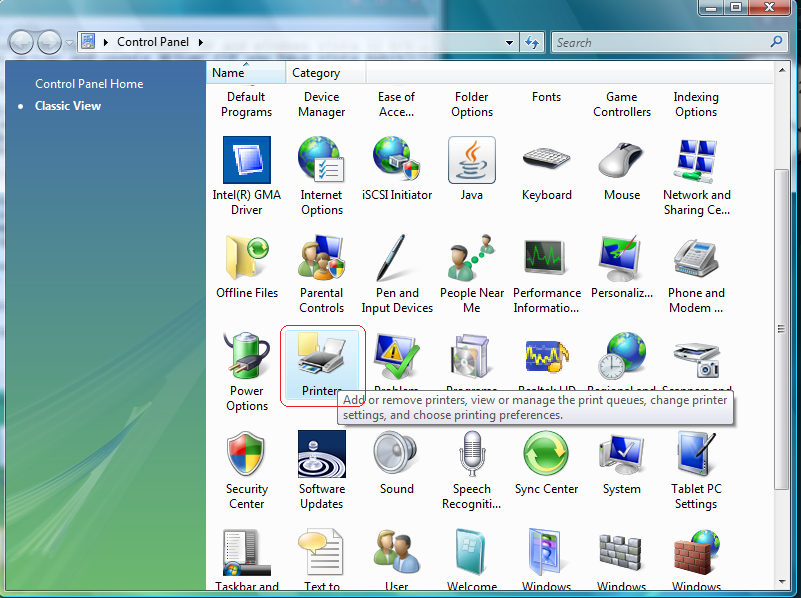
Find the Printers Icon (In Windows XP it is Printers and Faxes) and double click that.
Here you will see a list of all you printers set up already. Now we want to find the
Add a printer button. On Vista its on the top of the bar like this:

And on a Windows XP machine its here:
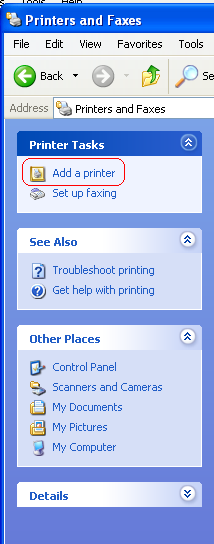
Now that we have found it click on "Add a Printer" and we can start setting up the printer.
Choose the Add a local printer option.
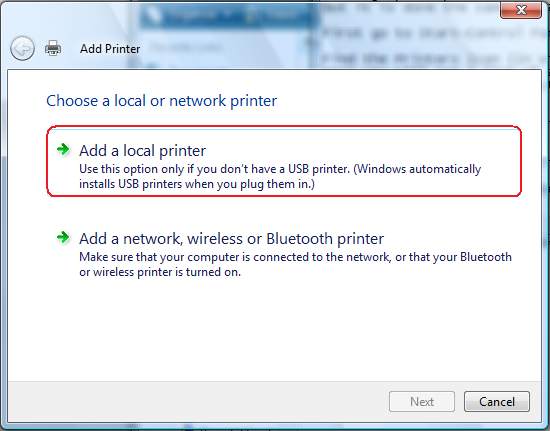
For XP Users:
It is almost the same except make sure that "Automatically detect..." is not checked.

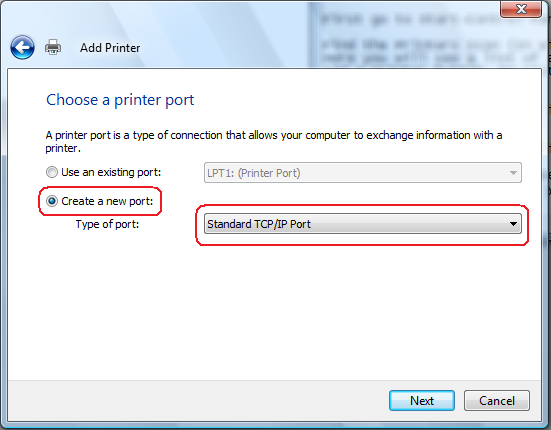
This
will ask you what port you want to use. Here we select "Create a new
port" and in the drop down
menu we select "Standard TCP/IP Port" from
the options and click Next
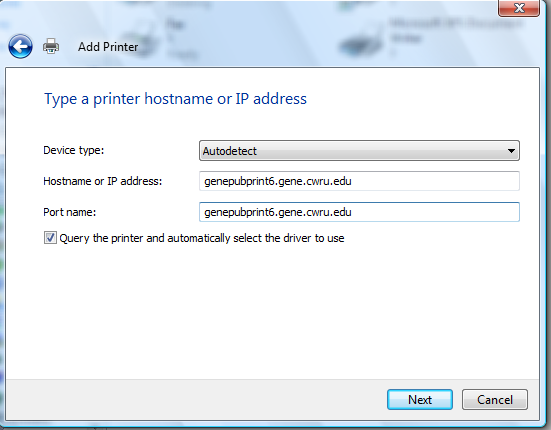
VISTA USERS: Now it will ask you information for the printer hostname. Make sure Device type is "Autodetect"
Here we type "genepubprint6.gene.cwru.edu" it automatically fills in the Port Name you can keep that.
Make sure that Query the printer and automatically select the driver to use IS selected
and click next.
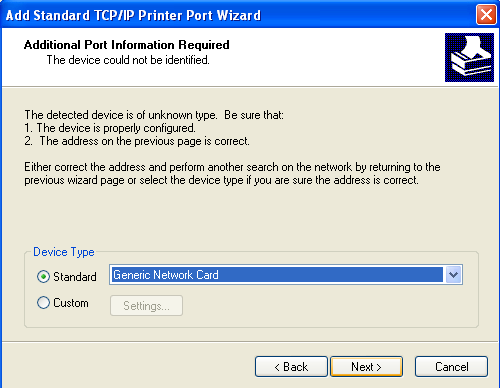
XP USERS:
After you add the hostname XP users will be asked to give the device type. Here we want to
select "Generic Network Card" and click "Next".
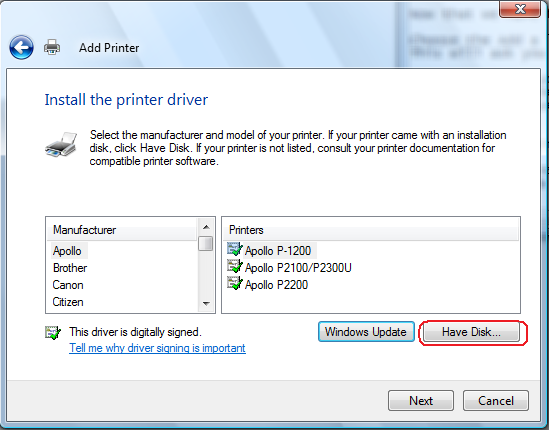
Now we are at "Install the printer driver"
We find the "Have Disk" button and double click.
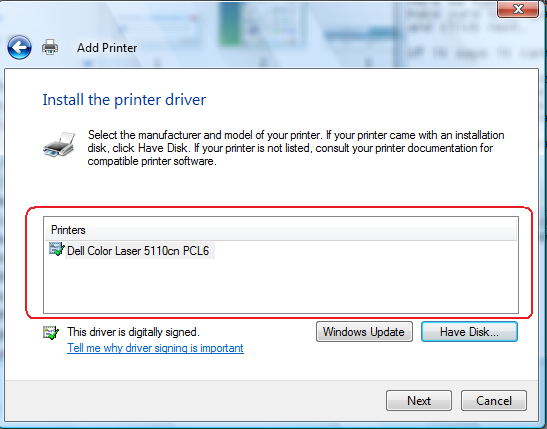
Select the Browse button and find the driver located C:/dell/drivers/R168756/Win_x32/PCL/English/
in that folder there is a file called "dlxzizi" click on that and choose open and then ok in the other menu.
Now you should see the printer displaying:
Click Next
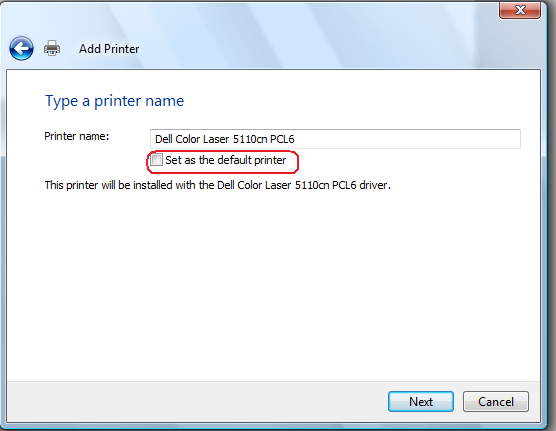
Name the printer anything you would like. and uncheck the "Set as the default printer" if you don't
want this printer to be your default.
Choose Next:
It will go through installing the printer for you. When its done you may click finish to exit.
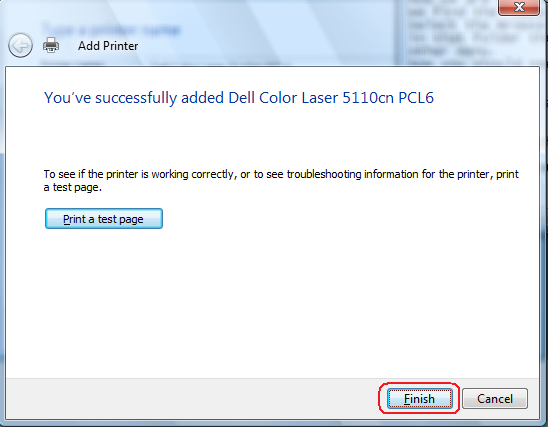
Now the Dell Printer is Installed and ready for printing!
For Vista Users Only!
If you are using Windows Vista you must download this here (R149293) which is the
update driver for Vista. It works almost the same way as the driver above
except when its completed inside the unzipped folder that pops up you want to
click VistaPrinterUpdate and update the driver to work for Vista.

PRINTING DOUBLE SIDED
(Duplex Printing)
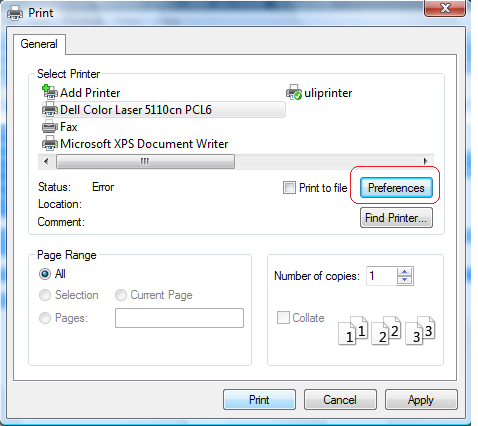
To duplex print when you click file-print from any application it brings up the print
dialog appears:
1. Make sure the Printer is selected - genepubprint6.gene.cwru.edu
2. Click Preferences
3. Look at the image below to find the duplex printing and select one of the options. (Suggested "flip on long edge")
for best results.
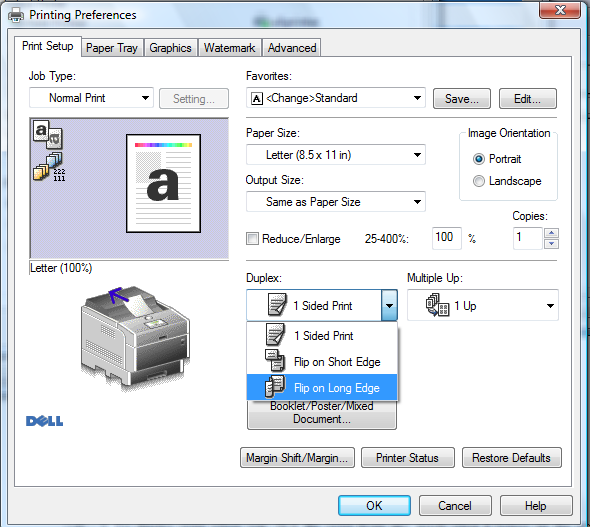
4. Click OK then click "Print".